

TL;DR: in this article, you will learn how to proactively scale your workloads before a peak in traffic using KEDA and the cron scaler.
When designing a Kubernetes cluster, you may need to answer questions such as:
- How long does it take for the cluster to scale?
- How long do I have to wait before a new Pod is created?
There are four significant factors that affect scaling:
- Horizontal Pod Autoscaler reaction time;
- Cluster Autoscaler reaction time;
- node provisioning time; and
- pod creation time.
Let’s explore those one by one.
By default, pods’ CPU usage is scraped by kubelet every 10 seconds, and obtained from kubelet by Metrics Server every 1 minute.
The Horizontal Pod Autoscaler checks CPU and memory metrics every 30 seconds.
If the metrics exceed the threshold, the autoscaler will increase the replicas count and back off for 3 minutes before taking further action. In the worst case, it can be up to 3 minutes before pods are added or deleted, but on average, you should expect to wait 1 minute for the Horizontal Pod Autoscaler to trigger the scaling.

The Cluster Autoscaler checks whether there are any pending pods and increases the size of the cluster. Detecting that the cluster needs to scale up could take:
- Up to 30 seconds on clusters with less than 100 nodes and 3000 pods, with an average latency of about five seconds; or
- Up to 60-second latency on clusters with more than 100 nodes, with an average latency of about 15 seconds.

Node provisioning on Linode usually takes 3 to 4 minutes from when the Cluster Autoscaler triggers the API to when pods can be scheduled on newly created nodes.

In summary, with a small cluster, you have:
```
HPA delay:          1m    +
CA delay:           0m30s +
Cloud provider:     4m    +
Container runtime:  0m30s +
=========================
Total               6m
```

With a cluster with more than 100 nodes, the total delay could be 6 minutes and 30 seconds… that’s a long time, so how can you fix this?
You can proactively scale your workloads, or if you know your traffic patterns well, you can scale in advance.
Preemptive Scaling with KEDA
If you serve traffic with predictable patterns, it makes sense to scale up your workloads (and nodes) before any peak and scale down once the traffic decreases.
Kubernetes doesn’t provide any mechanism to scale workloads based on dates or times, so in this part, you will use KEDA– the Kubernetes Event Driven Autoscaler.
KEDA is an autoscaler made of three components:
- a scaler;
- a metrics adapter; and
- a controller.

You can install KEDA with Helm:
```bash
$ helm repo add kedacore https://kedacore.github.io/charts
$ helm install keda kedacore/keda
```
Now that Prometheus and KEDA are installed, let’s create a deployment.
```yaml
apiVersion: apps/v1
kind: Deployment
metadata:
  name: podinfo
spec:
  replicas: 1
  selector:
    matchLabels:
      app: podinfo
  template:
    metadata:
      labels:
        app: podinfo
    spec:
      containers:
        - name: podinfo
          image: stefanprodan/podinfo
You can submit the resource to the cluster with:
```bash
$ kubectl apply -f deployment.yaml
```
KEDA works on top of the existing Horizontal Pod Autoscaler and wraps it with a Custom Resource Definition called ScaleObject.
The following ScaledObject uses the Cron Scaler to define a time window where the number of replicas should be changed:
```yaml
apiVersion: keda.sh/v1alpha1
kind: ScaledObject
metadata:
  name: cron-scaledobject
  namespace: default
spec:
  maxReplicaCount: 10
  minReplicaCount: 1
  scaleTargetRef:
    name: podinfo
  triggers:
    - type: cron
      metadata:
        timezone: Europe/London
        start: 23 * * * *
        end: 28 * * * *
        desiredReplicas: "5"
```
You can submit the object with:
```bash
$ kubectl apply -f scaled-object.yaml
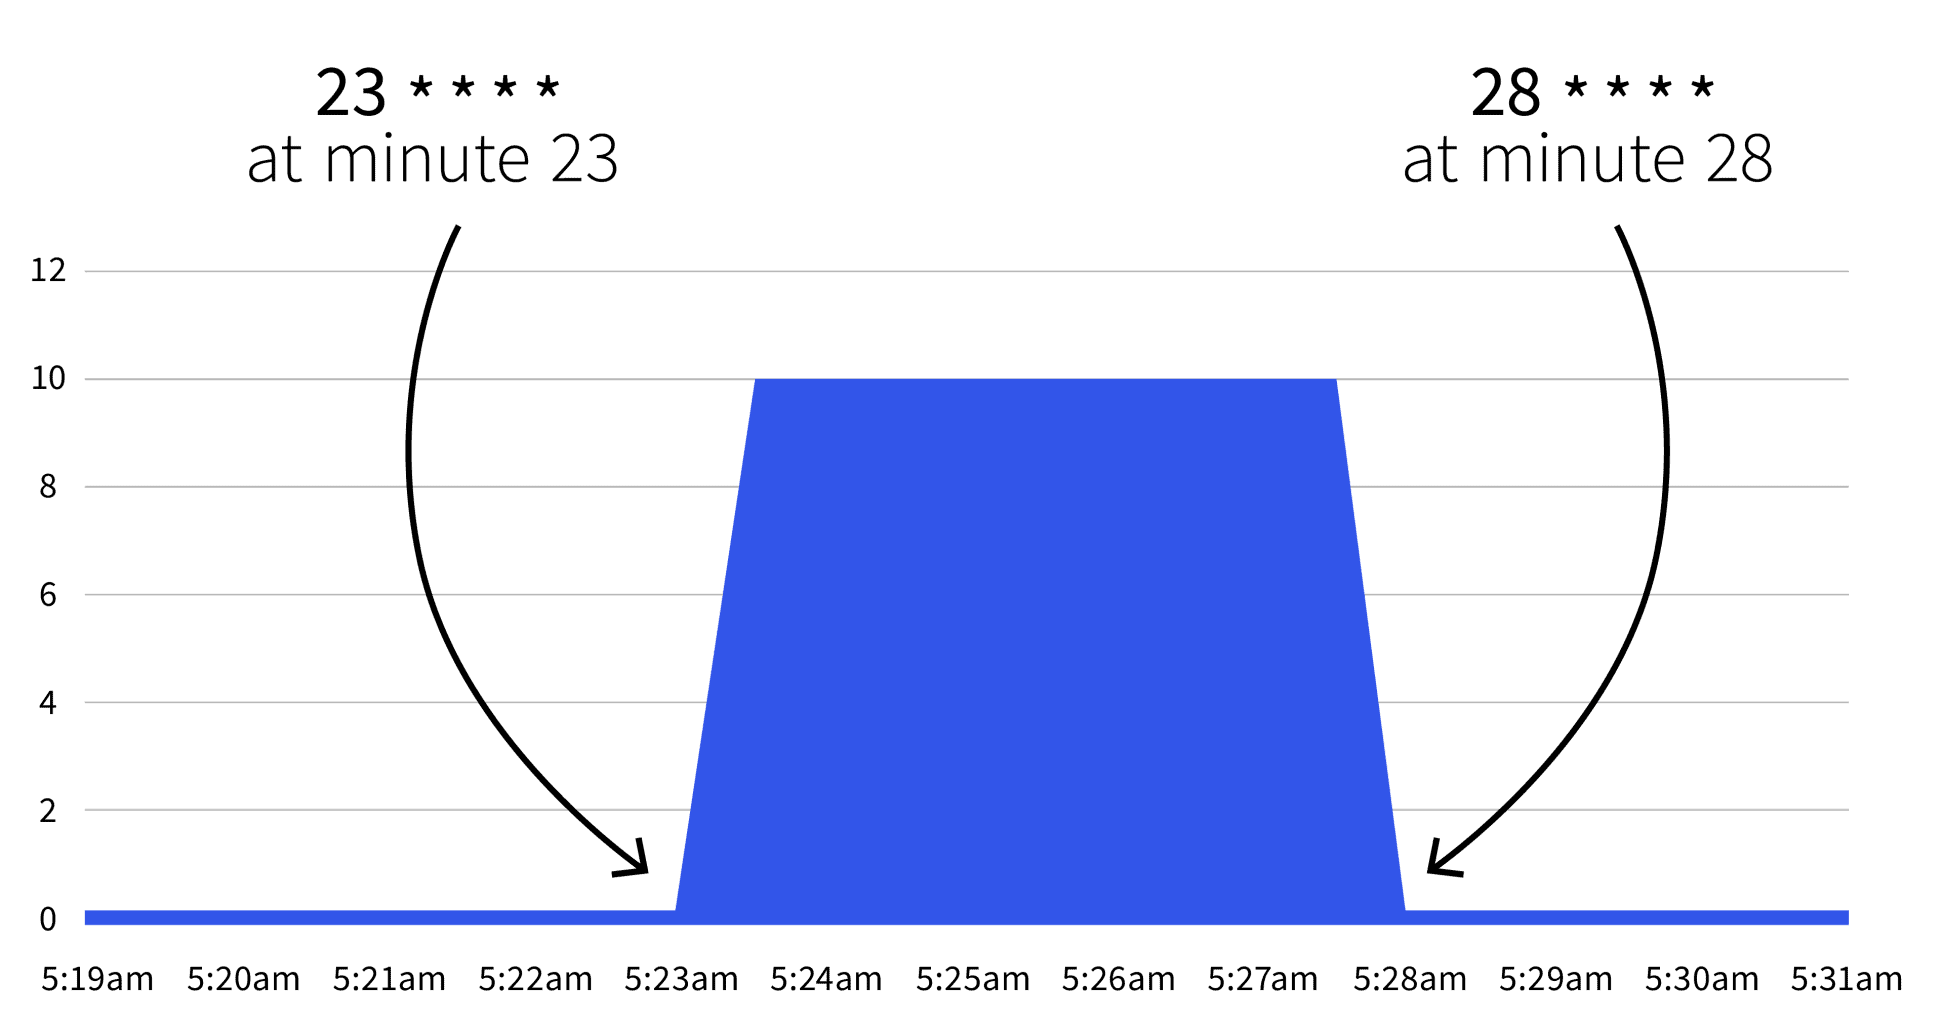
```What will happen next? Nothing. The autoscale will only trigger between 23 * * * * and 28 * * * *. With the help of Cron Guru, you can translate the two cron expressions to:
- Start at minute 23 (e.g. 2:23, 3:23, etc.).
- Stop at minute 28 (e.g. 2:28, 3:28, etc.).
If you wait until the start date, you will notice that the number of replicas increases to 5.
Does the number go back to 1 after the 28th minute? Yes, the autoscaler returns to the replicas count specified in minReplicaCount.
What happens if you increment the number of replicas between one of the intervals? If, between minutes 23 and 28, you scale your deployment to 10 replicas, KEDA will overwrite your change and set the count. If you repeat the same experiment after the 28th minute, the replica count will be set to 10. Now that you know the theory, let’s look at some practical use cases.
Scaling Down During Working Hours
You have a deployment in a dev environment that should be active during working hours and should be turned off during the night.
You could use the following ScaledObject:
```yaml
apiVersion: keda.sh/v1alpha1
kind: ScaledObject
metadata:
  name: cron-scaledobject
  namespace: default
spec:
  maxReplicaCount: 10
  minReplicaCount: 0
  scaleTargetRef:
    name: podinfo
  triggers:
    - type: cron
      metadata:
        timezone: Europe/London
        start: 0 9 * * *
        end: 0 17 * * *
        desiredReplicas: "10"
```
The default replicas count is zero, but during working hours (9 a.m. to 5 p.m.), the replicas are scaled to 10.

You can also expand the Scaled Object to exclude the weekend:
```yaml
apiVersion: keda.sh/v1alpha1
kind: ScaledObject
metadata:
  name: cron-scaledobject
  namespace: default
spec:
  maxReplicaCount: 10
  minReplicaCount: 0
  scaleTargetRef:
    name: podinfo
  triggers:
    - type: cron
      metadata:
        timezone: Europe/London
        start: 0 9 * * 1-5
        end: 0 17 * * 1-5
        desiredReplicas: "10"
```
Now your workload is only active 9-5 from Monday to Friday. Since you can combine several triggers, you could also include exceptions.
Scaling Down During Weekends
For example, if you plan to keep your workloads active for longer on Wednesday, you could use the following definition:
```yaml
apiVersion: keda.sh/v1alpha1
kind: ScaledObject
metadata:
  name: cron-scaledobject
  namespace: default
spec:
  maxReplicaCount: 10
  minReplicaCount: 0
  scaleTargetRef:
    name: podinfo
  triggers:
    - type: cron
      metadata:
        timezone: Europe/London
        start: 0 9 * * 1-5
        end: 0 17 * * 1-5
        desiredReplicas: "10"
    - type: cron
      metadata:
        timezone: Europe/London
        start: 0 17 * * 3
        end: 0 21 * * 3
        desiredReplicas: "10"
```
In this definition, the workload is active between 9-5 from Monday to Friday except on Wednesday, which runs from 9 a.m. to 9 p.m.
Summary
The KEDA cron autoscaler lets you define a time range in which you want to scale your workloads out/in.
This helps you scale pods before peak traffic, which will trigger the Cluster Autoscaler in advance.
In this article, you learnt:
- How the Cluster Autoscaler works.
- How long it takes to scale horizontally and add nodes to your cluster.
- How to scale apps based on cron expressions with KEDA.
Want to learn more? Register to see this in action during our webinar in partnership with Akamai cloud computing services.


Comments